Get an Easy Online Loan from Paysense: Step by Step Guide
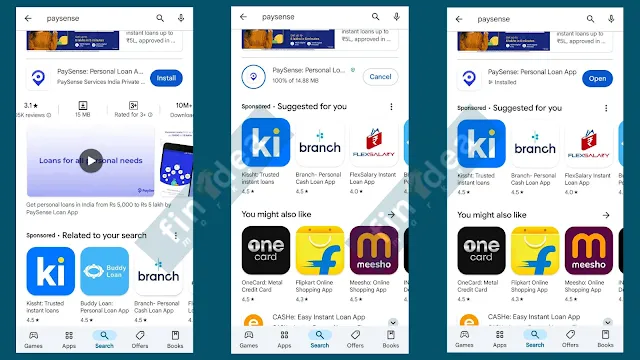
You can download the app directly from the Google Play Store or, for the simplest method, via the exact link.
Short intro about the PaySence online loan app
Paysense, founded in 2015 and based in Mumbai, is a venture backed financial services startup. It specializes in using advanced data sciences to provide credit without the hassle of complex application processes, arduous physical proofs, and long waits.
Here are a few benefits of using Paysense:
Quick Approval: Most applications are processed within minutes, and approval can happen as quickly as a few hours.Flexible Loan Amounts: Borrow up to ₹5,00,000 based on your needs and eligibility.
Minimal Paperwork: Online application means you won’t be overwhelmed with forms and documents.
Easy EMI Options: Paysense offers flexible EMI plans that fit within your budget.
Step 1: Check Your Eligibility
Paysense has a few criteria to determine eligibility. To be eligible, you typically need:
To be an Indian citizen aged between 21 and 60 years.A stable monthly income. Paysense works with both salaried and self employed individuals.
Paysense’s eligibility criteria may vary slightly, so it’s best to check their website or app for the latest requirements.
Step 2: Download the Paysense App
Start by downloading the Paysense app from the Google Play Store or the App Store. The app is essential for managing the loan process, from application to EMI payments.

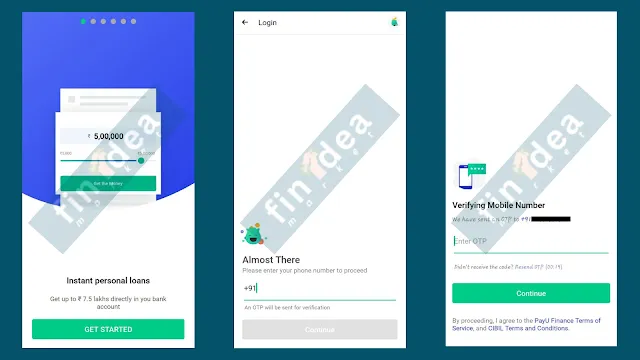
Once installed, create an account or log in if you already have one.

Step 3: Complete the Application
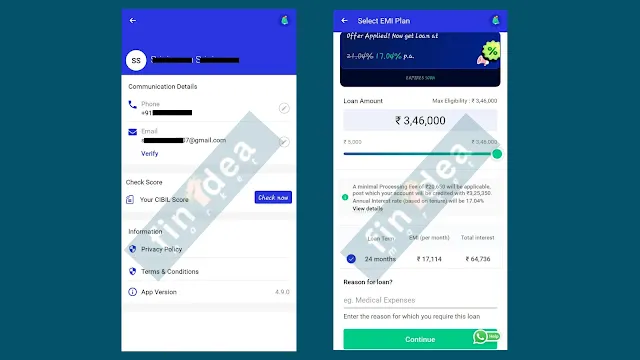
After logging in, begin your application by entering basic personal and financial details, including:
Personal Information: Name, date of birth, contact details.
Employment Details: Whether you’re salaried or self-employed, and your monthly income.
Loan Amount: Specify how much you’d like to borrow, considering your eligibility and the loan cap of ₹5,00,000.

Step 4: Submit Required Documents
Paysense will ask you to upload specific documents to verify your identity and income. Common documents include:
Identity Proof (Aadhaar or PAN card)Ensure your documents are clear and legible, as this can help speed up the verification process.
Step 5: Wait for Approval and Loan Disbursement
Once Paysense has reviewed your application and verified your documents, they’ll notify you about the loan approval status. Many applications are approved within a few hours, and the funds can be disbursed to your account almost instantly.
Managing Your Paysense Loan and EMI Payments
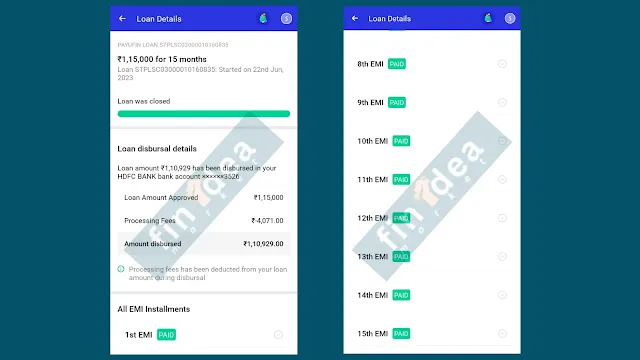
With your loan approved, you must repay it in monthly EMIs. Here’s how you can stay on top of your repayments:
Automatic Debit: Set up automatic payments to ensure you never miss an EMI.Track Repayments: The Paysense app allows you to track your EMI payments, view your loan balance, and manage changes.
Missing an EMI payment can affect your credit score, so set reminders or enable auto-debit to avoid penalties.

Tips for Responsible Borrowing
Review EMI Plans Carefully: Choose an EMI plan that aligns with your monthly budget to avoid financial strain.
Disclaimer
We are not responsible for anything from this application so please take your own risk before applying for a loan. Fin Idea Market

